
InPlace Assessors Guide
The following guide covers the basics of using InPlace like logging in, viewing your learner placements, approving timesheets and submitting absences.
1. To sign in, please go to https://placements.hud.ac.uk/, and click on ‘Other Accounts’. You will then need to enter your log in credentials – your work email and the password you chose when finalizing your account set up, and then click ‘Log in with your InPlace Account’.

2. The first time you log into InPlace you will be presented with a screen outlining the Terms and Conditions for the system. Please ensure you read this carefully before acknowledging it.
1. Once you’ve logged in, the first screen you will see is your Dashboard. Depending on what placements have been confirmed/learners who are currently on placement, your home screen may look slightly different. You can navigate back to this screen at any time by selecting the home icon from the top left of the screen.
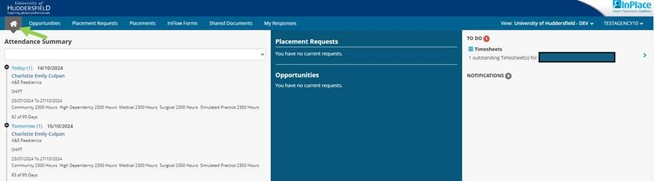
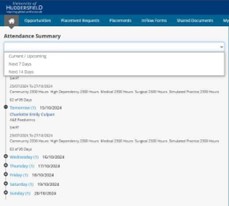
2. On the left side of the screen, you can see which learners are due to be on placement. You can filter this by the drop down, and you can also collapse/expand the days by clicking on the plus or minus icon, should you wish.
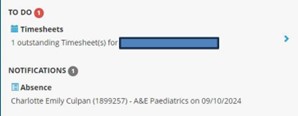
On the right side of the screen, you can view anything that you need to action. You can also see any system notifications, be that from actions that have occurred, or bulk notifications that the Placements Team may release to you.
1. To view your learner allocations, navigate to the ‘Placements’ tab at the top of the screen.
You can view your current and historic placement allocations. You can use the filter section to only show learners as required, e.g. select ‘completed’ or ‘current’ status.
You can also alphabetise the list of placements by any of the column headers, by clicking on that column header.
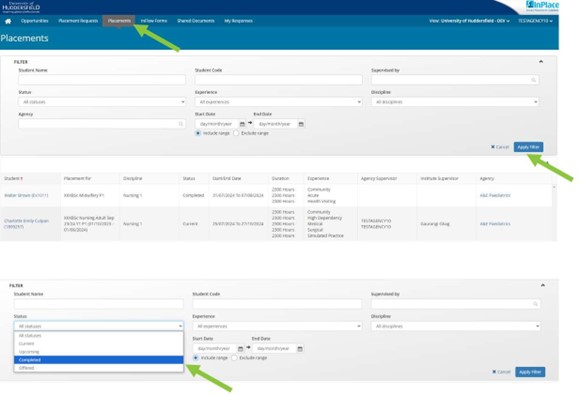
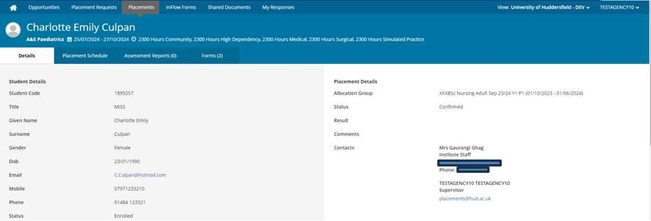
2. To view a learners record, simply click on that learners name, which will take you to the below view.
1. To view a learner’s timesheets, from the learners details page, select the ‘Placement Schedule’ tab. This displays all days during the placement block a learner can attend.
Please note, this will not be the days/shifts they have been assigned to via the roster but instead all days they are on placement with you.
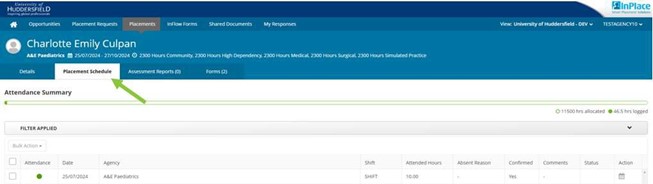
2. A filter feature allows you to only see timesheets between self-defined dates. Simply enter in the dates you wish to view placements between and then click ‘Apply Filter’.

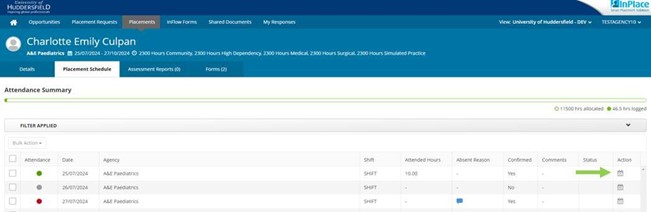
3. To view the learner’s submission, click on the calendar icon from the ‘Actions’ column.
4. A pop-up window will display the timesheet information the learner has submitted.
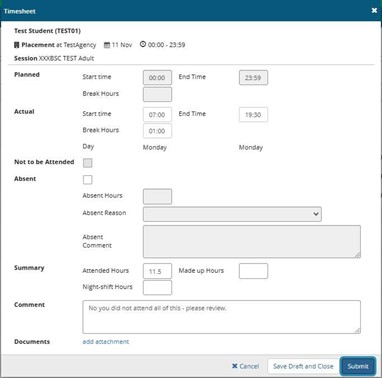
5. You can then review the information the learner has entered, such as start and end time, break hours etc. If the information entered is correct, then you can approve the timesheet by clicking ‘submit’.
If the information entered needs to be amended by the learner, then you can enter in a comment within that section, and then select ‘Save Draft and Close’. This will save the comment against the timesheet, but not mark it as confirmed.
Once you have approved the timesheet, the timesheet will show as ‘Yes’ in the confirmed column.

1. InPlace also has the functionality to bulk approve several timesheets at once.
To bulk approve hours/days for students – you can select the box alongside the column titles or select specific days from the list as required.
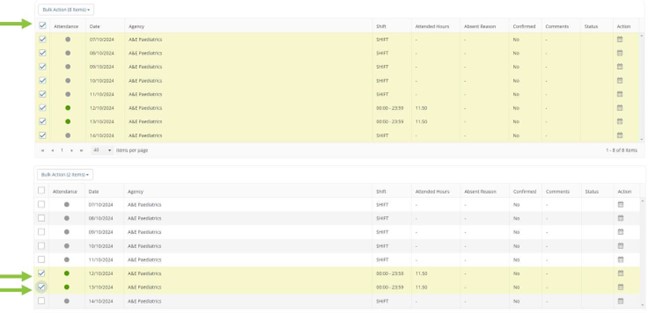
2. Having selected the submissions you wish to approve, click on the ‘Bulk Action’ button above the table (this will also show how many items you have selected to action).
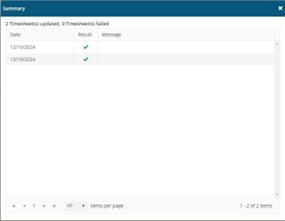
You can then select the ‘Mark Timesheet as Confirmed’ action. Upon selecting this, you will get a summary of the actions undertaken, which will appear as below.
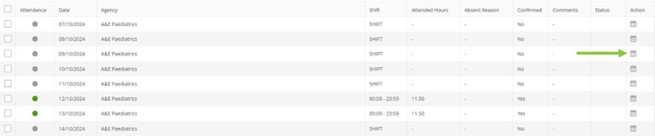
3. Once you have approved the timesheet, the timesheet will show as ‘Yes’ in the confirmed column, as before.
Having approved the timesheet, this will the be locked down for the learner. Should the information need updating, then you are able to do this via your account.
If you require the student to update their timesheet information after it has approved, then please email inplace-support@hud.ac.uk, and a member of the team will action this for you.
1. The University procedure for absences is that the learner records any and all absences through InPlace. They must also inform you as their placement area, and the University of any absence(s) they have (such as sickness etc). If the learner is also an apprentice, they may also need to inform their employer of any absence(s).
Should the learner not arrive on placement when expected (for a shift as opposed to being late), having not informed you, you are able to log them as absent.
To log an absence, select the calendar icon against the day the student is absent
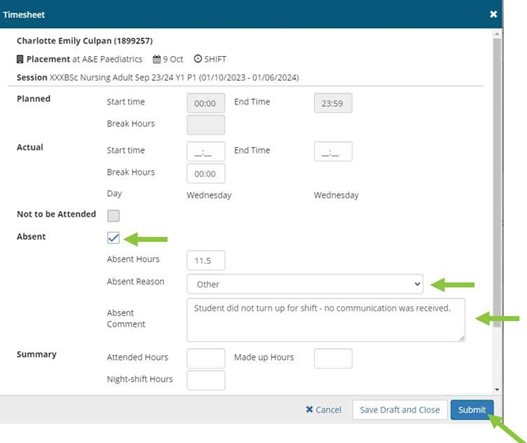
2. As before, the timesheet window will pop up. Check the ‘Absent’ box and add in the relevant information including absent hours, absent reason, and absent comment.
If you are recording a student as absent, we would ask that whichever colleague is logging said absence, add their name and the date to the comment field along with any other information.
Once you have entered in all relevant information, select the ‘Submit’ button, which will mark the student as absent and automatically confirm the timesheet submission.
3. Once you have submitted the absence record, the absence has now been logged, a per the below image. As you can see, there is an icon in the ‘Absent Reason’ column and the timesheet has been marked as ‘Confirmed’.
